Follow Me On Social Media!
Red Velvet Whoopie Pies: Indulgent Treats You’ll Love!
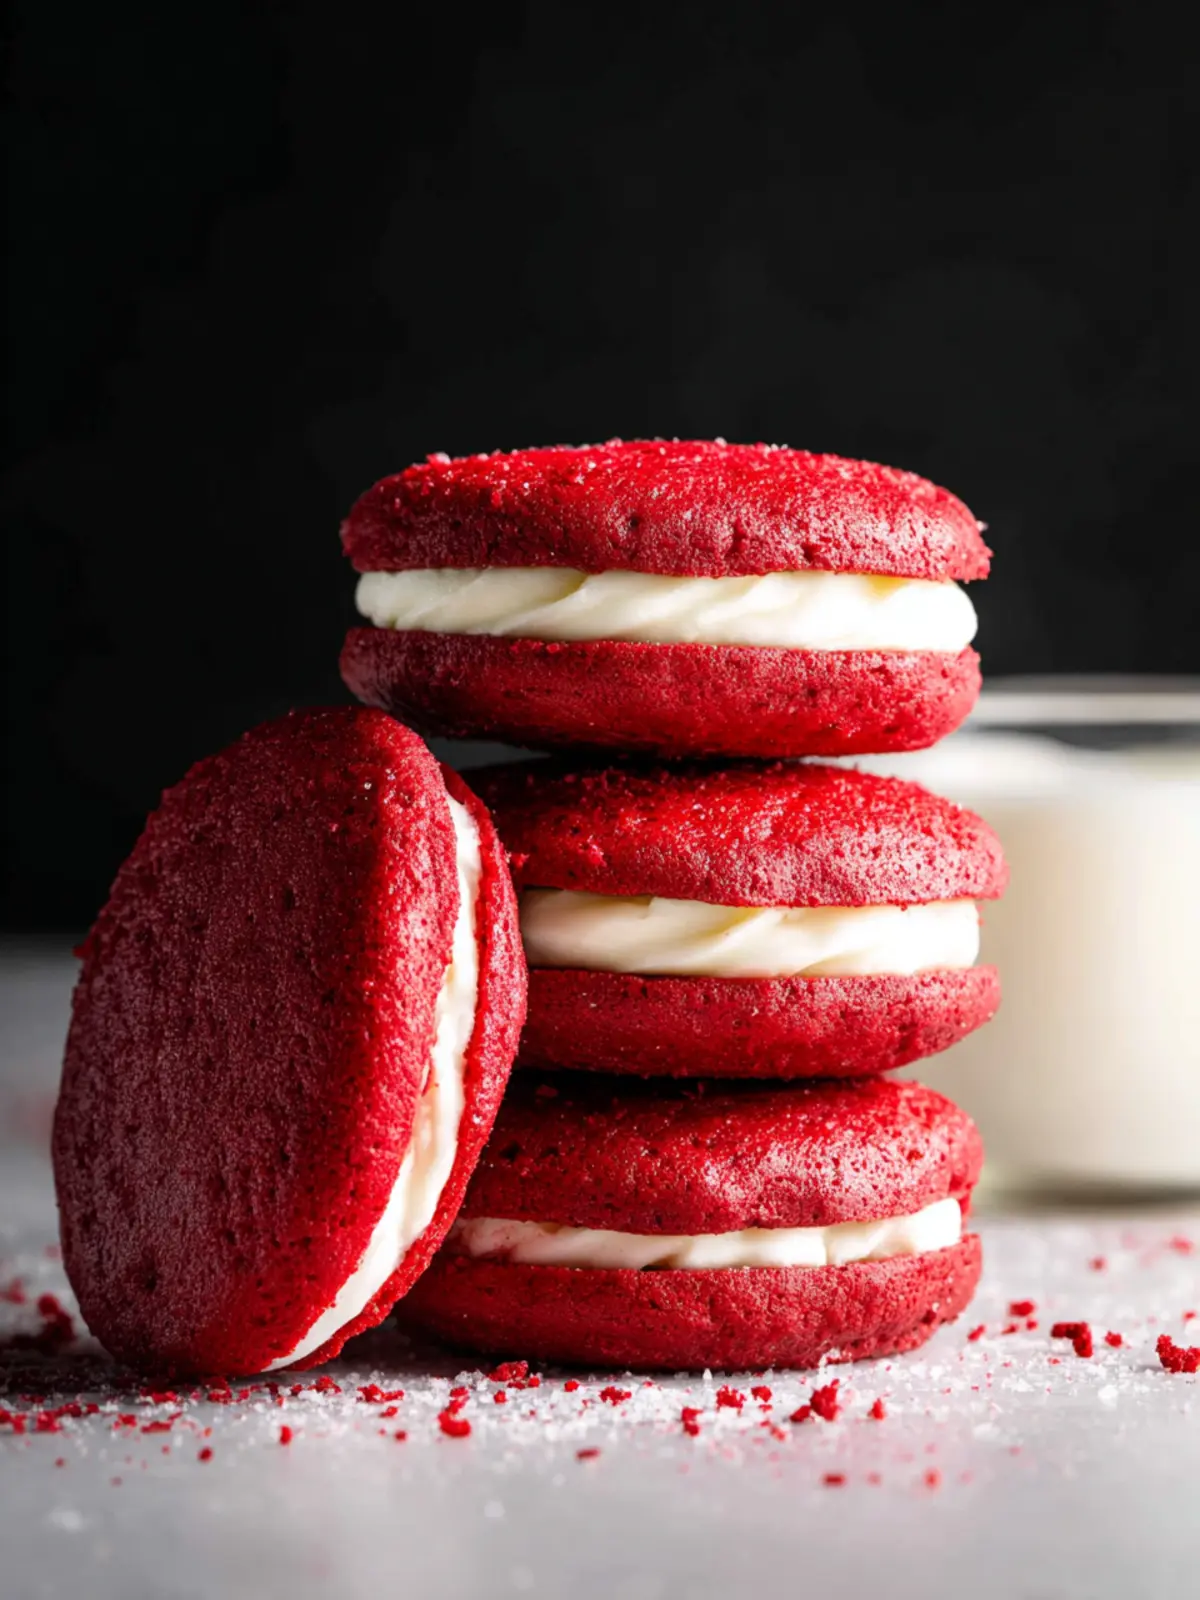
Introduction to Red Velvet Whoopie Pies
When my taste buds first encountered red velvet whoopie pies, it was nothing short of a revelation. These delightful treats, with their soft, cake-like outer shells and creamy filling, captured my heart and my palate in a way that few desserts ever have. My journey with them began on a sunny afternoon at a quaint bakery in my hometown, where the distinctive red hue and subtle cocoa undertone beckoned me closer. One bite, and I was hooked!
Not only are red velvet whoopie pies visually stunning, they also deliver a rich and velvety flavor that’s hard to resist. The contrast of the traditional cream cheese filling against the light, fluffy cookies creates a wonderful balance that nearly transcends ordinary dessert experiences. Sharing these whoopie pies with friends has become a sort of ritual—each time, I rediscover how special they are to celebrate life’s little moments, from birthdays to cozy get-togethers.
The best part? These sweet treats are incredibly approachable, making them perfect for both novice bakers and seasoned pros looking for a fun project. The recipe involves simple Ingredients that can be found in most kitchens, and the satisfaction of biting into a homemade whoopie pie is truly unmatched. It’s a great way to impress your friends or simply treat yourself after a long week.
To make your own batch of red velvet whoopie pies, gather your loved ones in the kitchen, crank up your favorite playlist, and let the baking begin! Not only will you enjoy the process, but you’ll also create a delightful dessert that embodies love, laughter, and a bit of nostalgia. So roll up your sleeves and join me in crafting these irresistible whoopie pies that are sure to become a favorite dessert for years to come.
A Personal Story Behind My Love for Red Velvet Whoopie Pies
As I mentioned, my fondness for red velvet whoopie pies stems from that serendipitous discovery at the bakery. Since that first encounter, I’ve made it a mission to refine my own recipe, experimenting with different ingredients and techniques until I felt ready to share this delightful version that perfectly captures my love for these baked beauties. Whether you’re new to baking or simply looking to try something different, I sincerely hope these whoopie pies bring you as much joy as they have brought me.
Let’s dive into the recipe and create something truly special together!
Key Ingredients for Red Velvet Whoopie Pies
Baking red velvet whoopie pies is all about balancing rich flavors with light, fluffy textures. Let’s explore the essential ingredients that come together to create these delightful treats.
Unsalted Butter: I turn to unsalted butter for its creamy richness and precise flavor control. It’s softened to room temperature, making it easy to blend smoothly into the batter, ensuring a moist final product.
Sugar: Granulated sugar sweetens the cookies perfectly, while brown sugar adds a hint of moisture, enhancing that delectable texture we all love.
Vanilla: A splash of pure vanilla extract elevates the flavor, blending harmoniously with the chocolatey notes of cocoa powder.
Egg Yolk: The egg yolk adds richness to the batter and helps create that soft, tender cookie texture.
Red Food Coloring: This is what gives our pies their signature appearance! Make sure to use a high-quality gel or liquid food coloring for the best results.
Flour: All-purpose flour is the backbone of the cookie batter, providing the structure necessary for these whoopie pies to hold their shape.
Baking Soda: This does double duty, acting as a leavening agent and also helping to balance the acidity from the buttermilk and cocoa.
Buttermilk: For ultimate tenderness, buttermilk is an essential ingredient that adds moisture and a subtle tang.
Cream Cheese: The star of the filling, cream cheese gives a rich, creamy texture and a slight tartness, perfectly complementing the sweetness of the cookies.
Powdered Sugar: This is used to sweeten the cream cheese filling, creating a smooth, velvety consistency that is simply irresistible.
With these ingredients, your red velvet whoopie pies will be a delightful treat that elegantly bridges a classic flavor with a unique twist. Happy baking!
Why You’ll Love These Red Velvet Whoopie Pies
A Delightful Twist on a Classic
Imagine sinking your teeth into a soft, fluffy cookie enveloped in luscious cream cheese frosting—red velvet whoopie pies take traditional flavors and morph them into a delightful handheld treat. The rich cocoa and hints of vanilla meld perfectly with that signature red hue, making every bite irresistibly scrumptious. These whoopie pies are not just cookies but tiny love letters crafted for dessert lovers everywhere.
Perfect for Any Occasion
Whether it’s a cozy get-together, a birthday celebration, or simply a Tuesday that needs a sprinkle of joy, red velvet whoopie pies fit flawlessly into any event. Their charming appearance and rich flavors make them an inviting dessert for guests or a special treat to enjoy on your own. Plus, they travel well, so feel free to share them with friends—or keep them all to yourself!
Easy to Make and Customize
Getting cozy in the kitchen doesn’t have to be complicated. These red velvet whoopie pies are straightforward to whip up, perfect for even novice bakers. The basic recipe is easily adjustable, allowing you to personalize the filling or even add a bit of spice. Want to throw in some white chocolate chips or switch up the frosting? Go for it! The beauty of these whoopie pies lies in their versatility, making them a canvas for your own culinary creativity.

Cooking Tips and Notes for Red Velvet Whoopie Pies
Crafting red velvet whoopie pies is more than just following a recipe; it’s about understanding how each ingredient plays its role in creating that luscious texture and flavor. Here are some handy tips to ensure your whoopie pies turn out perfectly every time.
Importance of Ingredient Temperature
Using ingredients at the right temperature is crucial for achieving the desired consistency in your red velvet whoopie pies. Eggs and butter should be at room temperature to help them emulsify and create a smooth batter. Cold ingredients can lead to a lumpy mixture, affecting the final texture.
Tips for Achieving the Perfect Texture
To get that ideal whoopie pie texture—soft yet sturdy—focus on these pointers:
- Don’t Overmix: After adding the dry ingredients, mix just until combined. Overmixing can lead to tough pies.
- Scoop Size: Use a standard ice cream scoop for uniformity. This ensures even baking and that all your pies look delightfully similar.
- Correct Baking Time: Keep an eye on them in the oven! They’re done when they spring back lightly when pressed.
Storage Advice for Freshness
To keep your red velvet whoopie pies fresh, store them in an airtight container at room temperature for up to three days. If you want to keep them longer, consider freezing them. Just make sure to wrap each pie individually in plastic wrap and place them in a freezer-safe bag. They can be enjoyed for up to a month!
Serving Suggestions for Red Velvet Whoopie Pies
Ideal Pairings for a Sweet Treat
Red velvet whoopie pies aren’t just a delightful dessert; they can be elevated when paired with the right accompaniments. To enhance their rich flavor, consider serving them with:
- A Glass of Cold Milk: The classic pairing that never disappoints. The creaminess of milk balances the sweetness of the whoopie pies perfectly.
- Coffee or Espresso: For those coffee enthusiasts, a dark roast adds a delightful contrast to the cake’s sweetness.
- Fresh Berries: Adding a side of raspberries or blueberries introduces a tart contrast that complements the rich flavor of the red velvet.
Creative Ways to Present
Presentation can transform a simple treat into a showstopper. Here are a few ideas to serve your red velvet whoopie pies creatively:
- Layered Dessert Cups: Crumble the whoopie pies into cups and layer with whipped cream and berries for an elegant twist.
- Dessert Platter Display: Arrange them on a vibrant platter alongside other colorful desserts, creating a visually stunning dessert table.
- Garnish with Mint: A sprig of fresh mint not only adds a pop of color but also brings a refreshing note to your sweet treats.
With these serving suggestions, your red velvet whoopie pies are sure to impress at any gathering!

Time Breakdown for Red Velvet Whoopie Pies
Creating delicious red velvet whoopie pies is more than just a delightful treat; it’s an experience that blends childhood nostalgia with adult flavors. To make your baking journey smooth, here’s a handy time breakdown to help you plan out your day.
Preparation Time
Getting everything ready is essential, and for these whoopie pies, plan on about 20-25 minutes. This includes gathering ingredients, mixing the batter, and preparing your baking sheets.
Baking Time
Once your batter is ready, it’s time to bake! Each batch typically takes 10-12 minutes in the oven until they’re fluffy and just set.
Cooling Time
Allow your red velvet whoopie pies to cool for about 15-20 minutes on a wire rack. This step is crucial for achieving the perfect texture before adding your filling.
Total Time
From start to finish, expect your delightful baking venture to take around 1 hour. This includes prep, bake, and cool times, giving you a well-deserved break before the sweet reward!
Nutritional Facts for Red Velvet Whoopie Pies
Indulging in red velvet whoopie pies can feel like a delightful escape, but it’s good to know what you’re enjoying! These sweet treats pack a punch in flavor, too, so let’s break down the nutritional facts.
Calories
Each whoopie pie typically contains around 160 calories. This makes it an excellent choice for a dessert that’s both satisfying and indulgent without veering too far off the calorie scale.
Carbohydrates
With roughly 22 grams of carbohydrates per pie, red velvet whoopie pies can certainly satisfy your sweet tooth. The sweet, rich filling complements the cake-like exterior, making it an enchanting treat.
Fats
When it comes to fats, expect about 6 grams per whoopie pie. These fats mainly come from the butter and cream cheese frosting, adding a richness that perfectly balances the pie’s sweetness.
Now you can enjoy these delicious treats while being mindful of their nutritional content!
FAQ About Red Velvet Whoopie Pies
Curiosity about red velvet whoopie pies is as vibrant as their color. This delightful treat has become a beloved classic, and with its rich flavor and soft texture, it raises many questions. Here’s a handy FAQ section to help you bake these dreamy pies with confidence.
Can I use a different coloring agent?
Absolutely! While traditional red velvet whoopie pies rely on red food coloring for that iconic hue, you can experiment with natural alternatives. Beet juice or pomegranate juice are lovely substitutes, lending a mellow flavor and a beautiful color, though they may not achieve the same vivid shade. Experimenting can lead to fun surprises!
How long do these pies last?
When properly stored, your red velvet whoopie pies can stay fresh for about 3 to 5 days at room temperature in an airtight container. If you want to extend their life, consider refrigerating them, which can extend freshness up to a week. Just be sure to let them come to room temperature before enjoying, as that enhances their soft texture!
Is it possible to make these gluten-free?
Definitely! You can swap out the all-purpose flour in the red velvet whoopie pies recipe with a gluten-free all-purpose flour blend, which often works well as a 1:1 replacement. Just make sure your gluten-free flour contains xanthan gum for that essential binding quality. Many people enjoy the results, so give it a shot!
These red velvet whoopie pies are not just a treat; they can also be tailored to meet your dietary needs. Happy baking!
Conclusion on Red Velvet Whoopie Pies
In the delightful world of desserts, red velvet whoopie pies stand out as a celebration of flavor and texture. These soft, cake-like cookies filled with rich cream cheese frosting offer an irresistible treat that feels indulgent yet achievable in your own kitchen. As you enjoy them fresh out of the oven or shared with friends, consider the joy of baking them from scratch. The vibrant color and luscious cream fill not only satisfy sweet cravings but also create memorable moments. So, whether for a special occasion or just an everyday treat, these whoopie pies are sure to delight all who taste them.
Print
Red Velvet Cake Sandwiches
- Total Time: 30 minutes
- Yield: 8 sandwiches 1x
- Diet: Vegetarian
Description
Delicious red velvet cake sandwiches filled with a sweet cream cheese filling.
Ingredients
Scale
- 3 tablespoons unsalted butter (softened)
- 1/4 cup + 2 tablespoons sugar
- 1/4 teaspoon vanilla
- 1 large egg yolk
- 1/2 teaspoon red food coloring
- 1/2 cup + 2 tablespoons flour
- 1/4 teaspoon baking soda
- 1/4 cup buttermilk
- 3 ounces cream cheese (softened)
- 2 tablespoons unsalted butter (softened)
- 1/2 cup powdered sugar
- 3 teaspoons buttermilk
- 1/4 teaspoon vanilla
Instructions
- Pre-heat the oven to 350°.
- Cut a sheet of parchment paper that fits a large sheet pan. Use a 6-ounce standard ramekin to trace 8 circles onto the paper. Flip the paper over so that the pencil marks won’t touch the cakes.
- Then, in a large bowl, beat together the butter, sugar and vanilla.
- Add the egg yolk and food coloring.
- Sift over the flour and baking soda. Beat it together, adding the buttermilk slowly. The batter will be thick. Use a cookie scoop to measure 2 teaspoons into each circle on the sheet pan. Spread the dough into a circle as best you can.
- Bake for about 10 minutes; they will still be very soft but a toothpick inserted will come out clean. Let cool on the pan for a few minutes before moving them to a wire rack. Let cool completely before adding filling.
- Beat together all filling ingredients. Divide the filling between 4 cakes. Top with the 4 remaining cakes to make sandwiches.
Notes
- Ensure the cakes are completely cool before adding the filling to prevent melting.
- Use red food coloring as desired for the intensity of color.
- Prep Time: 20 minutes
- Cook Time: 10 minutes
- Category: Dessert
- Method: Baking
- Cuisine: American
Nutrition
- Serving Size: 1 sandwich
- Calories: 200
- Sugar: 15g
- Sodium: 150mg
- Fat: 8g
- Saturated Fat: 5g
- Unsaturated Fat: 2g
- Trans Fat: 0g
- Carbohydrates: 30g
- Fiber: 1g
- Protein: 2g
- Cholesterol: 40mg


